

Best Tempering Strategy In Diablo 4
The Tempering system in Diablo 4 is a key part of gear customization, allowing players to enhance items with specific powerful affixes that can significantly improve any build. Mastering it can greatly improve your build efficiency and overall power, but there are some pitfalls to avoid falling into. Learn the best ways to temper easily, regardless of build!
Tempering is a tricky system to get right and before we start, understand that there is inherently some randomness involved in the upgrades. Perfecting gear will take many spare items, but there are ways to still make a great piece while minimizing the risk.
Maximizing Temper Rolls
Before tempering anything, it's important to note that there is a way to manipulate the amount of tempering rolls available on a piece of gear. All items that can be Tempered have both Inherent Temper points and Additional Temper points. These additional points are the item's Tempering Durability. Inherent Rolls allow you to pick one from each of two categories; the Tempering Durability determines how many extra rolls you can get.
-
Rare Items: 1 Inherent Temper point + 5 Tempering Durability
-
Legendary (Non-Ancestral) Items: 2 Inherent Temper points (one for each category) + 5 Tempering Durability
-
Ancestral Legendaries: 2 Inherent Temper points (one for each category + 5 Tempering Durability + 1 Tempering Durability per Greater Affix
Important: If you Enchant a Greater Affix off an Ancestral item before you've Tempered it, it will lose one Tempering Durability. However, if you have a GA item and you temper it fully, and THEN enchant off the unwanted Greater Affix, you will not lose what you've already rolled. However, if you ever reset your Tempers on this item, you will get the lower Tempering Durability.
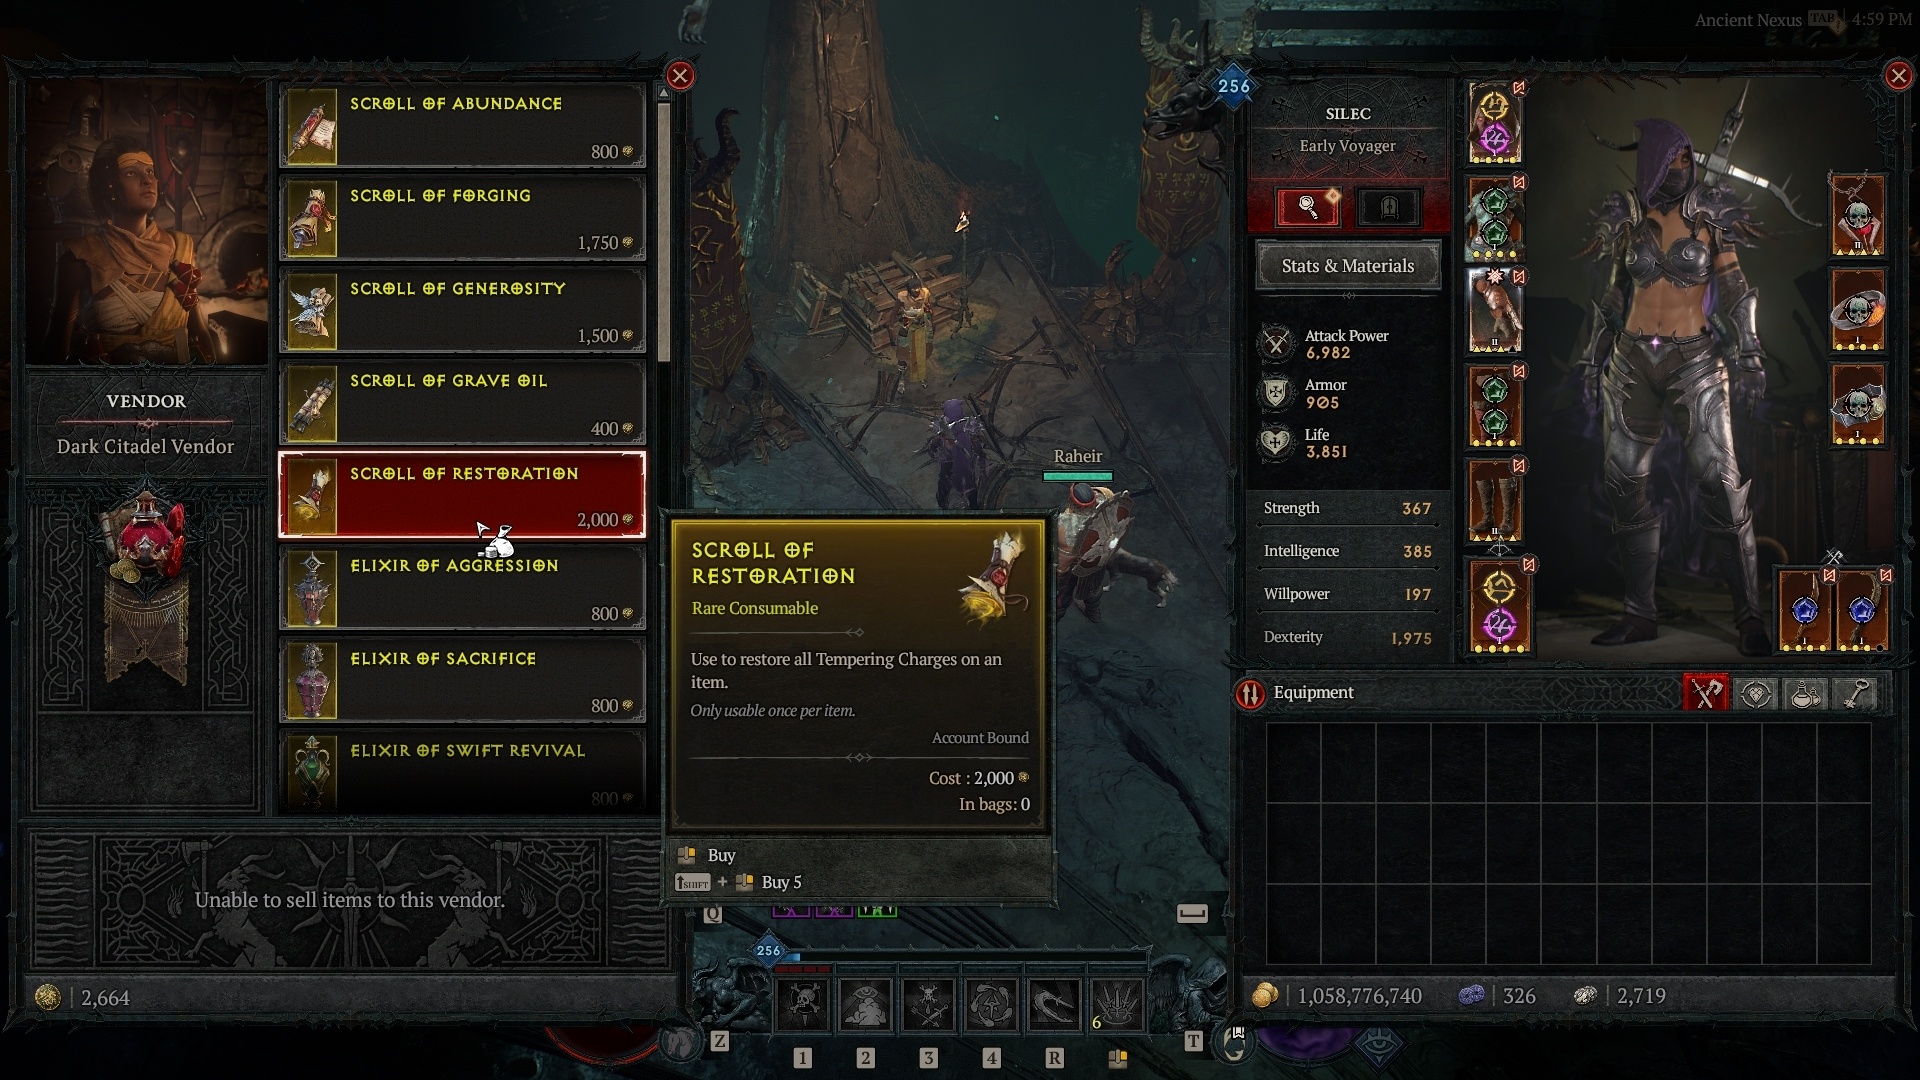
Players can also refresh their temper slots with a Scroll of Restoration,obtainable from the Dark Citadel in Nahantu, or from the Equipment Cache at the end of Infernal Hordes.
Additive vs Multiplicative Effects
Now that we understand how temper slots work, what are we using them on? For this its important to identify what the most important stat is that one could get from tempering. Most of the time, these will be multiplicative effects, and not additive. But what does that mean?
Additive damage multipliers are typically generic and shown on the left side of the character window, alongside many other stats. These are stats such as Critical Strike Damage, Overpower Damage, Vulnerable Damage, Damage with X Element (such as Fire/
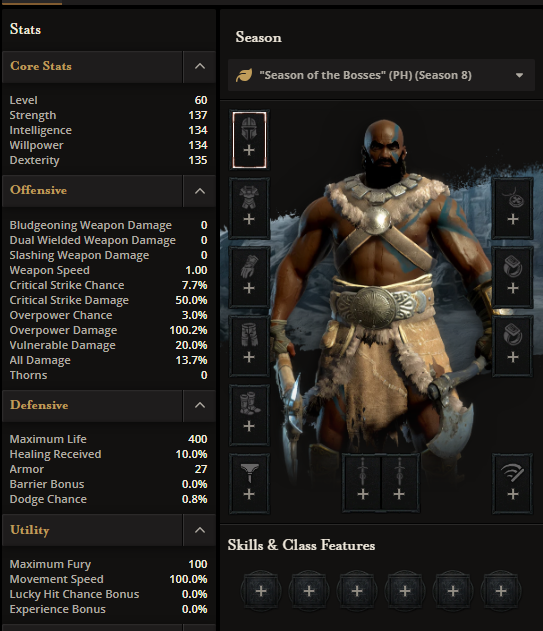
Even on a character with no gear, there are plenty of additive effects on the character sheet
Multiplicative damage multipliers on the other hand are their own "bucket". These are effects that stand on their own and multiply damage without any additional effects influencing them. Items such as Heir of Perdition are great examples of this effect. The [x] portion of the Helm's effect indicates a multiplier, making Heir of Perdition an incredibly strong item before considering other stats. These multipliers are also accessible in tempering.
Multipliers can sometimes be a little difficult to see on first glance without seeing an [x] in the effect, but can be quickly identified. Tempers such as Chance for Cataclysm to Deal Double Damage and Chance for Earthquakes to Cast Twice are the easiest to see as the wording itself says "double" or "twice", but that's not all. Some tempers such as Casted Hydras Have +[1 - 2] Heads or Increased Duration effects can be multipliers in their own regard, adding an additional vector to scale an ability. These effects are the ones we want to target, as they will give us a considerable boost in damge.
Temper Time!
For most items, players can almost entirely ignore an additive damage temper. The most impactful tempers are the ones that will directly impact the uptime on important effects through cooldown reduction effects, or are a build-related multiplier as discussed above. Because these effects are much more powerful than the additive bonuses, hitting them first is paramount. This should be ALL temper slots if necessary. After getting the targeted multiplier effect, using generic and all-around additive tempers like Worldly Finesse or Natural Finesse can add that extra small bit of power on top to finish an item.
At this point, tempering is complete, and the item can be masterworked and used for a long time. An ancestral legendary item that successfully has its multiplier and a usable additive is enough to complete all content in the game, but some might want to go even higher. This is where spare items with multiple GA's come in, and the usage of MANY Scroll of Restoration will most likely be required. This process will take a long time and a lot of patience for not a lot of benefits, but can be used to make some of the most powerful items in the game. Keep following the tips above to hit perfect rolls, and don't be afraid to settle for a slightly sub-optimal additive effect. Good Luck!